This wikiHow teaches you how to set up and use Apple Pay to make online and in-person payments. Once you connect a valid debit or credit card to your wallet, you can use it to pay for things anywhere you see the Apple Pay logo. If you live in the United States, you can even use a debit card to exchange cash with friends and family.
Adding a Card on an iPhone or iPad
Open the Wallet app on your iPhone or iPad. You should find it on your home screen or inside a folder.
- Most credit and debit cards with Visa, Mastercard, American Express, or Discover logos can be added to Apple Pay.
- Apple Pay is not available in all countries.
Tap the plus ➕ in a circle. It’s at the top-right corner of the screen.
Tap the blue Continue button.
Align the front of your credit or debit card in the camera frame. Your iPhone will scan the card information and attempt to verify it with your bank.
- If you don’t want to scan your card, tap Enter Card Details Manually at the bottom of the screen instead, and then follow the on-screen instructions.
Follow the on-screen instructions to confirm. If your card issuer supports Apple Pay, you’ll be prompted to enter some additional information to confirm the account. Once confirmed, the card will be added and ready to use.
- Some banks require you to install a separate app to confirm the card. Follow the on-screen instructions to complete any bank requirements.
- The first card you add is set as your default payment method for Apple Pay. You can add additional cards if you wish.
Change your default payment method (optional). If you add multiple cards and want to change which card is used for payments, follow these steps:
- Open the Settings app and select Wallet & Apple Pay.
- Scroll down and tap Default Card under “Transaction Defaults.”
- Tap the card you want to set as your default.
- To remove a payment card, tap it, scroll to the bottom, and then select Remove this Card.
Adding a Card on a Mac
Click the menu on your Mac. If your Mac has built-in Touch ID (the touch bar that runs along the top of the keyboard), you can use it to add your card. If not, you’ll need to add the card on an iPhone or iPad. The Apple menu is at the top-left corner of the screen.
- Most credit and debit cards with Visa, Mastercard, American Express, or Discover logos can be added to Apple Pay. Most major card issuers and banks in other countries also participate in the program.
Click System Preferences on the menu.
Click Wallet & Apple Pay. Some information about Apple Pay will appear in a window.
Click the Add Card button at the bottom of the window.
Enter your card details and click Next. The card issuer will now verify your info.
- If you want to add the card you’ve already associated with iTunes, you’ll be prompted to enter its security code, which you’ll usually find in the signature field.
Follow the on-screen instructions to add your card. If your card issuer doesn’t need additional information, click Next when prompted to add the card.
- If more info is needed before the card can be added, gather the requested information, and then enter it by navigating back to System Preferences > Wallet & Apple Pay and selecting your card.
- To add another card, click the + under the panel that runs along the left side of the window.
Change your default payment method (optional). If you add multiple cards and want to change which card is used for payments, follow these steps:
- Go to System Preferences > Wallet & Apple Pay
- Click to select a card from the “Default Card” menu at the bottom of the screen.
- To delete a card, select it from the list in the left panel and click the – button.
Paying in a Store or Other Physical Location
Look for the Apple Pay logo. Most stores, vending machines, and vehicles that accept Apple Pay display sticker with a black Apple logo and the word “Pay.” Sometimes you’ll see a black-and-white illustration of a hand holding a credit card near several curved lines. See this page on Apple’s website for a list of all possible logos.
Pay using Face ID or a passcode. If you use Face ID or a passcode to unlock your iPhone, follow these steps to process your in-person payment:
- Double-click the button on the side of your iPhone.
- Look at your phone unlock with Face ID or enter your passcode.
- If you want to pay with a different card, tap your default card and then select an alternative.
- Hold the top of the phone near the contactless reader. A checkmark and the word “Done” will appear once your payment is processed.
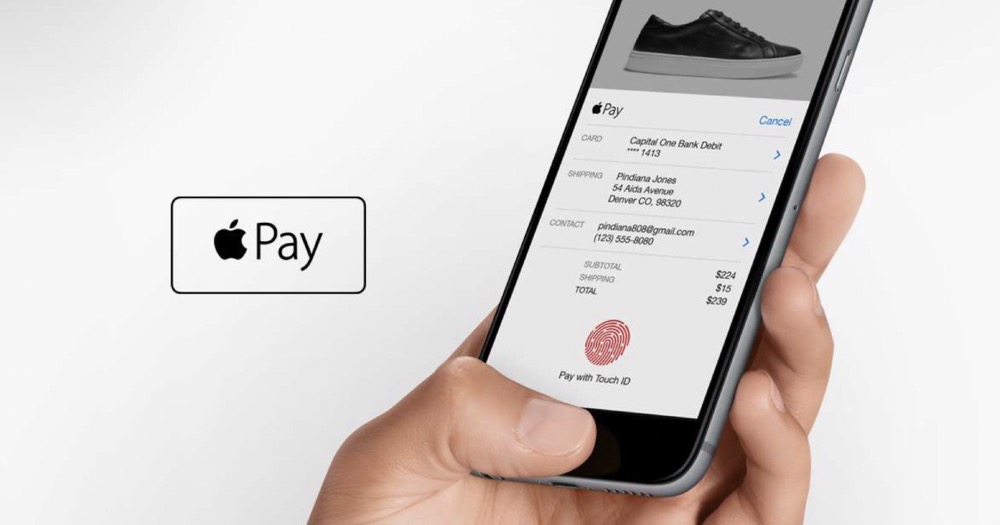
Pay using Touch ID. If you use your fingerprint to unlock your iPhone’s screen, follow these steps to pay in person:
- To use your default card, touch your finger to Touch ID and then hold the top of your phone to the contactless reader. When the payment is complete, you’ll see a checkmark and the word “Done.”
- To use a different card, just hold the top of your phone (without using Touch ID) to the contactless reader until your default card appears, tap the card, and then choose a different card. Then, use Touch ID to complete the payment.
Pay using an Apple Watch. Here’s how:
- Double-click the button on the side of the watch face.
- If you want to select a different payment method, tap your default method and then make your selection.
- Hold your watch within a few centimeters of the contactless reader.
- After you feel a tap on your wrist, tap the Digital Crown button to confirm the payment.
Paying in an App or on the Web
Tap the Apple Pay button on the item you want to purchase. If the app you’re using accepts Apple Pay, you’ll usually see a button that says Buy with Apple Pay button on the product page. This will bring up your default payment method.
- You can use this method on an iPhone, iPad, or a Mac with Touch ID.
Select a different card (optional). If you don’t want to use your default card, tap the blue > (mobile) or the two arrows (Mac) next to your card, and then make your selection.
Verify your billing and shipping information. If anything in this section is incorrect or blank, you can edit it as needed. The info will then be saved for future purchases.
Confirm your payment. Once your payment is complete, you’ll see a checkmark and the word “Done” on the screen. The steps to confirm vary by model:
- If you’re using an iPhone X or an iPad that supports Face ID, you can pay by double-clicking the side button and then verifying your face or passcode.
- If you have an iPhone 8 or earlier (or an iPad that doesn’t have Face ID), confirm the payment using Touch ID or the passcode you use to unlock your screen.
- If you’re using a Mac with Touch ID, place your finger on the Touch ID bar when prompted to do so. You may have to tap the Apple Pay icon on the Touch Bar before your fingerprint is recognized.
Sending and Receiving Cash
Make sure you meet the minimum requirements. You can use Apple Pay to send and receive cash as long as you meet the following requirements:
- Be at least 18 years old and live in the United States.
- Have an iPhone or iPad running 11.2 or later (or an Apple Watch with watchOS 4.2 or later).
- Have two-factor authentication set up for your Apple ID.
- An eligible debit card (connected to your bank) added to Apple Pay.
Open the Settings app on your iPhone or iPad. It’s on the home screen or inside of a folder.
Scroll down and tap Wallet & Apple Pay.
Slide the “Apple Cash” switch to the On position. It’s at the top of the screen.
Tap Apple Cash under “Payment Cards.” Some information about Apple Cash will appear.
Follow the on-screen instructions to set up Apple Cash. Once the process is complete, you’ll be able to send and receive cash with Apple Pay.
- When someone sends you money, it will be added to your Apple Cash “card,” which is the thing you just set up. You can use the balance the same way you’d use any other card in Apple Pay.
- To transfer money from your Apple Cash card to your bank account, just tap the card in the Wallet app on your iPhone or iPad, tap Transfer to Bank, and then follow the on-screen instructions.
Send money to a contact. There are a few ways to do this:
- Contacts app: Tap a contact, tap the blue and white dollar sign $, and then follow the on-screen instructions to send cash.
- Messages app: Open a conversation with the person you want to pay, and then tap the Apple Pay logo at the bottom of the message. If you don’t see it, tap the “A” (App Store) logo first. Select an amount, tap Pay, and then tap the arrow to confirm.
- Siri: Just tell Siri how much you want to send and to whom. For example, “Hey Siri, Apple Pay $5 to Joe” or “Send 50 dollars to Eva.”
- Apple Watch: Open a new or existing conversation, scroll all the way down, and then tap the blue Apple Pay logo. Select the dollar amount and tap Pay.
- Replying to a request: If someone sends you a payment request, tap Pay on the message and then follow the on-screen instructions to process your payment.
Request money from a contact. You can use the Messages app or your Apple Watch to do this. Here’s how:
- Messages app: Open a conversation and tap the black and white Apple Pay logo at the bottom. If you don’t see it, tap the blue and white App Store icon (the “A”) first. Enter the amount you need, tap Request, and then tap the arrow to send.
- Apple Watch: Just tell Siri how much you want to send and to whom. For example, “Hey Siri, Apple Pay $5 to William” or “Send 50 dollars to Maria.”