Rather if you have Dish, AT&T, or cable and you are planning on getting satellite service for your home, you don't need to call a professional installer. Even if you don't have much construction experience, you can set up a satellite dish. Once you find an exact spot for your dish, mount it in place. Receive a satellite signal by pointing the dish up to the sky. With proper wiring, you can then transfer the signal to a receiver and your TV.
Making the Wall Mount
Select a flat spot on or around your home.
Find a level place that is accessible if you need to clean off or adjust the satellite dish later. If you have space, the safest place for a satellite dish is on the ground. It will have plenty of room to point north or south, depending on where you live. Also, keep the dish away from falling snow or ice, such as from your roof or nearby trees.
- Remember where the TVs are in your home. Try to find a spot close to them to make the wiring process easier.
- If you mount the dish on the ground, you will need to dig a trench to run its cables to your home safely.
Check for any obstructions blocking the dish’s view of the sky.
Stand where you plan on installing the dish. Look up to the sky. If you see buildings, trees, or even clotheslines in the way, then find another spot. These obstacles stop the dish from receiving a clear signal, affecting your picture quality.
- One of the best ways to set up a dish is by anchoring a metal pole in the ground with concrete, then mounting the dish on top of it. The rod gives the dish more height without it needing to be on the roof.
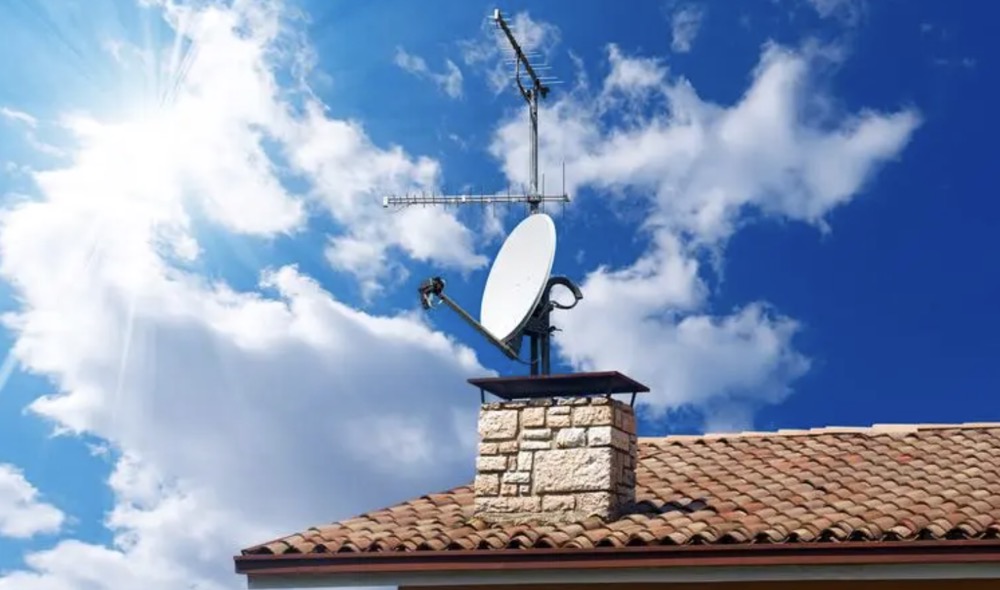
- Satellite dish installers almost automatically go for the roof to guarantee the satellite isn’t obstructed. You may need to do this, too, if you can’t find an exact spot elsewhere.
- If you’re in the northern hemisphere, the dish needs to point south to receive a signal. If you’re in the southern hemisphere, it needs to point north, so keep that in mind when looking for obstacles.
Hold the dish’s mount to your home and mark the screw positions.
The dish’s support is an L-shaped rod with a base plate that fastens to your home. Position the base plate flat against the wall or roof in the location you chose. Look for a series of holes on the plate for bolts. Then, use a permanent marker to note the position of these holes on the roof.
- If you’re attaching the satellite to the side of your home, make sure the holes align with a wall stud or another sturdy structure. Don’t try to anchor it to siding since it won’t hold.
Calculate the size of the pilot holes needed to secure the mount.
The holes’ exact size and depth depend on the dish you’re installing, so reference the components that came with the satellite. Generally, you will need to make a series of 4 holes about 1⁄2 in (1.3 cm) in diameter. Estimate the holes needed to be about {convert|2+1/2|in|cm|abbr=on}} deep, although this will also vary a little from installation to installation.
- Check the metal fixings that came with your satellite for a number engraved on them. That number will tell you how wide the holes need to be.
- To find the depth the holes need to be on your particular installation, add about in (0.51 cm) to the length of the metal fixings meant to plug into the holes.
Create the pilot holes using a drill bit the same size as the mounting bolts.
Use a masonry drill bit to break through stone and other rigid surfaces without damaging your drill. The bit needs to create holes that are the perfect size for the bolts. Drill into the spots you marked earlier once you are ready. Make sure the holes you create are straight, so the mounting bolts fit properly.
- If the holes are too big, the bolts will fall out. If they are too small, the bolts won’t fit.
- Erring on the side of caution is better when drilling. You can always widen a small hole.
Place the mount’s metal plugs into the holes you drilled.
Your dish will come with a set of metal plugs that serve as wall anchors. One end of each plug will have a bolt hole in it. Flip the plugs, so the openings face toward you rather than the wall. You need those openings to secure the mount.
- The opposite ends of each plug will look like a split tail. When you bolt the wall mount in place, the tails open up, making the plugs harder to remove.
Secure the plugs into the wall with a hammer and chisel.
Place the tip of a chisel against one of the bolts. Give the chisel’s handle a couple of good whacks to push the bolt into the wall. Keep hammering until the bolt is flush with the wall. Then, repeat this with the remaining bolts.
- Make sure the bolts are level with the wall, or else the dish’s mount won’t anchor properly.
Place the metal plugs and hammer them into the wall.
Your dish will come with a set of plugs that serve as wall anchors. Position them, so their open end faces out from the wall. That opening is for bolting the wall mount in place. After pushing the plugs into the holes, tap them in with a hammer and chisel.
- Make sure the plugins are firmly positioned inside the wall. They are what anchors the mount to the wall or ceiling. If they are loose, your dish could end up crashing to the ground!
Bolt the mount onto the plugs in the wall.
Position the mount back on the wall, lining up the plate’s holes with the pilot holes you drilled. Find the bolts that came with your dish, usually 1⁄2 in (1.3 cm) lag bolts. Fasten the bolts by using a cordless screwdriver. Make sure the mount feels secure in the wall before you move on.
- If the mount wobbles when you touch it, try tightening the bolts a little more. If you’re sure they are in correctly, take them out and recheck the plugs.
Cap each bolt with a metal washer and locking nut.
These components prevent the bolts from coming back out of the wall. Slide the washers on first, which are flat metal disks that help the nuts work properly. Then, add the nuts and turn them clockwise with a wrench until they feel tight and no longer move.
- Be careful not to overtighten the nuts. Stop twisting them when they become hard to move. As long as they are not loose, the mount will also stay in place.
Assembling the Dish
Attach the antenna bracket to the low noise block (LNB) arm.
Your dish will most likely come with a flat metal plate to connect the satellite dish to the L-shaped LNB arm and other components. Position the plate, so the prongs are on the left and right, facing you. Hold the LNB arm between the prongs with the tail end extending out past the plate’s opposite side. Place some 3⁄4 in (1.9 cm) lag bolts through the arm and into the plate, tightening them clockwise with a wrench.
- Remember to put a metal washer and locking nut on the ends of the bolts to ensure they can’t come loose.
- The exact installation process, including the bolts’ size, may vary a little depending on the dish you have. Refer to the owner’s manual for more specific instructions.
Clip the antenna adjustment panel over the plate’s prongs.
The panel will look like a square box with one end open. The panel’s sides fit over the plate’s prongs and attach with more 3⁄4 in (1.9 cm) lag bolts. Add a washer and nut on the end of each bolt after tightening them.
- The adjustment panel has a curved slot on it. This slot is what you use to point the satellite up or down.
Fit the U-shaped rod inside the adjustment panel.
Your dish will have a bent metal rod that fits into one of the slots on the adjustment panel. Slip the rod inside, sliding its prongs through the holes. Ensure the prongs point toward you rather than the tail end of the LNB rod you connected earlier. Fit a small clamp over it, followed by a washer and nut on each prong.
- The clamp is little more than a flat piece of metal meant to hold the U-shaped rod in place.
- The adjustment panel has 3 different slots. Use the slots to reposition the satellite dish. In most cases, the middle slot is best for setting the dish at the proper angle.
Bolt the antenna bracket to the back of the satellite dish.
You have a couple more bolts to add to finish the bulk of the assembly, and this is one of the easiest parts to finish. Line up the holes on the plate with the holes on the back of the dish. Stick the longest bolts you have, usually 2 to 3 in (5.1 to 7.6 cm) in length, through the front of the dish. Then, place a washer and nut on the end of each bolt, tightening it with your wrench.
- Make sure all of the components stay bolted together. If they feel shaky, carefully separate them and tighten the bolts.
Install the LNB on the end of the LNB arm.
One last component, the LNB, controls the dish’s functionality. First, slide the handle of the LNB onto the open end of the arm. Secure it with nuts and bolts, then take the LNB out of the box. It looks almost like a round speaker or flashlight. Position it on the handle, facing it toward the dish before bolting it in place.
- Some more robust satellites have up to 3 LNBs designed to feed a stronger satellite signal into your home.
- You may need to loosen the LNB later to readjust it and improve the signal quality.
Connect the adjustment panel on the dish to the wall mount.
Fit the dish onto the open end of the support. If everything is attached correctly, it will fit inside or behind the adjustment panel. You can then add the 1 or 2 remaining bolts to fasten these pieces together. If the dish looks good, then you’re ready to position it to communicate with a satellite.
- These parts can attach in a variety of different ways depending on what satellite you have, so be sure to refer to the owner’s manual.
- If the mount is meant to attach to the back of the panel, your satellite will also come with a pair of clips. Position them behind the support, then add the screws through them to bind the parts together.
Positioning the Dish
Select a satellite you wish to connect to.
Pick a satellite that is in range of your particular dish. There are numerous satellites out there, but dishes cannot get signals from all of them. If you bought your dish from a TV service, for instance, you might have a hard time connecting to their competitor’s satellites. Search for available satellites at https://www.lyngsat.com/.
- To differentiate between satellites, look at the names listed along with the coordinates. Tracking sites list the names, which usually include the owning company or the service they provide.
- If you bought a satellite service, it is possible to receive satellite signals outside that service. Since you usually need to replace several parts, it’s easier to get a new satellite instead.
- Try to pick a satellite close to your area. If you subscribe to a particular TV service, you will need to use the company’s satellites. The biggest providers have multiple satellites.
Find the satellite’s location before positioning the dish.
You’re going to need to point the dish in the correct direction, then angle it up at the sky. This isn’t easy to do if you don’t know the satellite’s positioning. Fortunately, satellites don’t move much, so you can use a positioning database to adjust your dish. Use a site like https://www.dishpointer.com/.
- Type in your address and choose a satellite you wish to connect to. The site will give you the precise positioning needed for your dish to receive the signal.
- You won’t be able to receive a signal from a distant satellite. Don’t expect to reach a Chinese satellite if you’re in North America, for instance.
Use the azimuth number to rotate the satellite.
Have a compass handy and locate true north first. Then, look at the azimuth number and find where that is on the compass. North is considered 0 degrees, east is 90 degrees, south is 180 degrees, and west is 270 degrees. Rotate the satellite dish horizontally until it points in the correct direction.
- For example, if you need to point the dish to 225 degrees, find north first. Then, turn the satellite southwest from there.
Move the dish vertically to adjust its elevation.
Once you know the height needed to reach the satellite, go behind the dish. Examine the end of the mount where it connects to the dish. You will see a bolt inside a slot labeled by degrees, usually 10 to 60. Loosen the bolt by twisting it counterclockwise, then reposition the dish to the proper elevation.
- Adjusting the elevation is usually pretty easy because of the labeled slot. Moving the bolt along the slot raises or lowers the dish.
- For instance, if the dish requires a 53-degree elevation, it will point up into the sky almost as much as it possibly can. Slide the loosened bolt back toward the 60-degree marker.
Adjust the dish’s polarization until you get a clear signal.
The final part that needs to be adjusted is LNB, responsible for receiving and sending the signal into your home. It is usually an arm on the front that points toward the dish. Test out the signal quality by hooking the dish up to the receiver and a TV, then loosen the connecting nut on the arm by turning it counterclockwise with a wrench. Gradually move the arm about 1⁄2 in (1.3 cm) at a time until the signal quality is perfect.
- This part is easier if you can set up a TV close to the dish. If the TV is far away, have someone else stand near it and give you feedback.
- You may need to wait to adjust the LNB until you’re done with the wiring. Take care of it before then, if you’re able, so you don’t have to keep climbing on the roof to make adjustments.
- The LNB can sometimes be controlled by turning a mount part on the back of the dish left or right.
Wiring and Connecting
Drill a 1⁄2 in (1.3 cm) hole in the roof if you need one.
Check your home first for a previously-used cable opening. The dish’s cable needs its own little space to enter your home and hook up to your TV. Unless your home is in the process of being built, drilling a single hole is the easiest way to do this. Position your TV and the satellite receiver nearby to prepare for the connection.
- If you’re installing the satellite on the ground, dig a trench to bury the cable, so it doesn’t get damaged. It needs to be below the frost line, the lowest point that freezes in winter, which is about 3 in (7.6 cm) deep.
- You will also need to ground the satellite dish and the mast. Install a grounding electrode conductor of minimum 10 AWG (copper) and 8 AWG (aluminum) connected to the existing grounding system of the building.
- Make sure to observe the NEC and local authority codes and requirements that concern proper grounding.
Run a coaxial cable from the LNB to the receiver.
Get a basic RG6 coaxial cable and look for a slot on the LNB. Plug it in, then plug the opposite end into the “Sat in” port on your receiver. Make sure the receiver is positioned close to the satellite to ensure the cable can reach it.
- You can buy a cable online, from hardware stores, and also from electronics suppliers. TV service providers will also give you one when you buy a satellite from them.
- The coaxial cable sometimes connects to the back of the satellite. Usually, though, it plugs directly into the LNB.
Connect an HDMI cable to the receiver and your TV.
Plug one end of the HDMI cable into the receiver’s back, then stretch it to the TV. Most modern TVs have a couple of HDMI slots, so choose whichever one you prefer. Once the cord is in place, your TV will be able to receive the satellite signal. Turn on the TV to see if it works.
- Some satellites and receivers don’t connect this way. The receiver may plug directly into the TV instead.
- Consult a wiring guide for specific instructions on how to connect the satellite, receiver, and your TV. If you bought the satellite from a TV service provider, they would also provide a wiring guide.
Turn on the TV to test the signal.
Press the satellite button if your remote has one or navigate to the settings menu. You should be able to get a picture right away. If the signal quality is poor, make sure you positioned the satellite dish correctly. Adjust it to get the clearest possible signal!
- You can check the settings menu to get an idea of where the satellite dish is.Please note the azimuth, elevation, and LNB numbers and compare them to the satellite’s location.
Tips
- Ask TV service providers for an install. Many of them offer free installations as long as you buy a subscription for their service.
- Find spots to hide loose cables in your home. If the satellite dish’s cable is exposed, put furniture and other decorations in front of it.
- Every satellite receiver needs a separate coaxial cable. You can’t split the cable, so you will need to find ways to route the cables all the way to the extra TVs you plan on setting up.
Warnings
- Be very careful when climbing onto the roof to install a dish. Avoid dangerous falls by wearing a harness and working on a warm, clear day.