Rocketfish makes TV mounts for flat-panel TVs. With their tilting or full motion mounts, you can place your TV on a wall and then tilt it to an optimal angle for viewing. Each mount package comes with the hardware and hex key you need to mount it; however, you will require several other tools to hang the TV properly.
Attaching TV Brackets
Cross reference the Rocketfish TV mount with the TV you own.
Each mount has a limit of weight it can support. For example, with most models your TV must be less than 130 lbs. (59kg).
Remove the stand from the back of the TV.
It will usually slide off or unscrew. Later, you will use these screw holes to mount the TV.
Survey whether the back of your TV is flat or curved.
You will attach the TV brackets with different processes depending upon this feature.
Find the hardware bags labeled M4, M5, M6 and M8.
These are different sized screws and washers, designed to mount to any flat-panel TV. You should also find a hex key that will install the screws.
Find the left and right TV brackets.
These are usually labeled B and C and have holes that allow you to install the brackets to many different TVs. They will run vertically down the back of the TV over the existing screw holes.
- Make sure you install the left and right brackets in identical holes, so the TV will fit squarely into the mount.
Attach the TV brackets to either side of a flat-backed TV using either the M4 and M5 washers and screws or the M6 or M8 washers and screws.
Test the kits out to see what fits into the screw holes. Use the hex key to tighten the screws.
- The order of installation goes bracket, washer and then screw.
- The M4/M5 kit usually includes 12mm screws.
- The M6/M8 kit includes 12, 16 or 22mm screws.
Attach the TV brackets to either side of a curved TV using spacers that were also included in the M4, M5, M6 or M8 packs.
Place the spacer above the screw hole on the TV, and then attach a washer, the bracket, another washer and a screw. Use the hex key to tighten the screws.
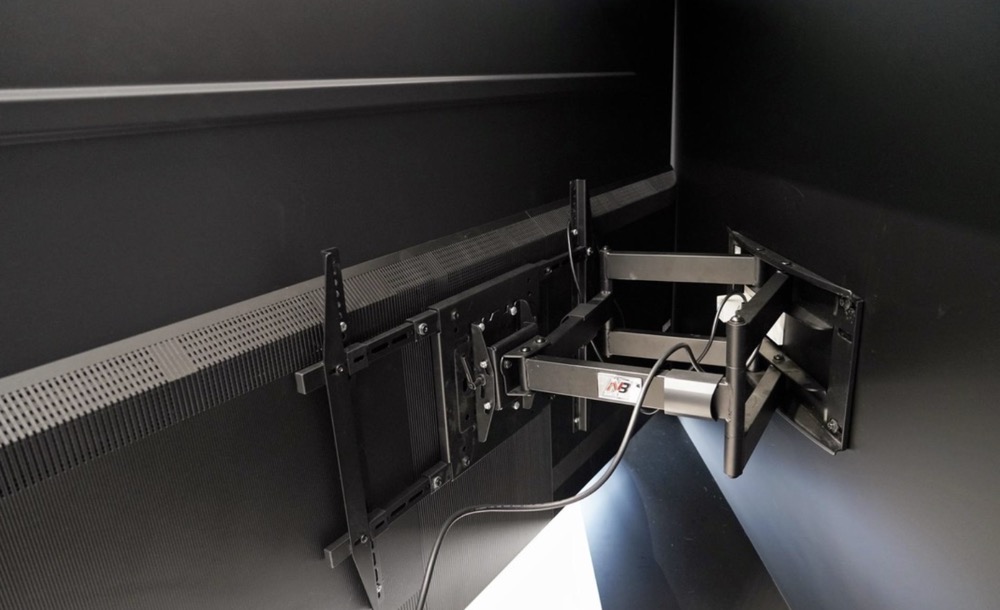
Find whether your TV mount includes horizontal bars.
They are usually included on models that include an arm assembly. If it does, slide them through the TV brackets horizontally and secure them with 9/16-inch Phillips head screws and a screwdriver.
Installing the Wall Plate
Search your wall for studs.
Use an edge-to-edge stud finder for best results. Choose a stud where you want your TV to be mounted securely.
- Use wall anchors if you are installing the TV mount into a concrete wall.
- Do not install the Rocketfish mount into drywall. It must be supported with a stud.
Hammer a pilot nail into the stud to ensure you have selected a steady location.
Align your wall plate with the area where you want to mount your TV.
Place a level above it and adjust until it is level. Mark the place where you will screw it in with a pencil.
Drill small pilot holes in these locations with an electric drill.
Place the wall plate over the holes.
Place a washer in front of each hole, followed by a lag bolt. Tighten the lag bolt into place with a socket wrench.
- Be careful not to over tighten the lag bolts or you risk damaging the stud and the TV.
Insert the arm assembly onto the wall plate if your Rocketfish mount includes one.
Slide it in from top to bottom, and then attach the cap screws with your hex key.
Mounting the TV
Lift the TV and tilt the top toward the wall if you have a tilting model without arm assembly.
Slide the brackets onto the wall plate until you hear an audible click. You may need assistance to lift the TV and find the right placement.
Alternately, lift the TV and slide it sideways onto the wall plate if it has arm assembly.
The arm must fit under the metal tabs. Secure the arm with bracket screws at the top and bottom.
Adjust the angle up and down on a tilting model.
Adjust the angle side to side with an arm assembly model. You will need to use your hex key to adjust some angles on the arm assembly.
Tips
- Review the Rocketfish manual before you begin installation. The instructions will vary slightly depending upon your model.